Updates: Check out the newest version of this mod here.
PROBLEM: The BS (BackSeat) of my Hyundai Elantra GT is entirely too dark! Since the GT has a moon roof the dome light is positioned toward the front of the car. This makes seeing anything behind the front seats almost impossible as they block the light.
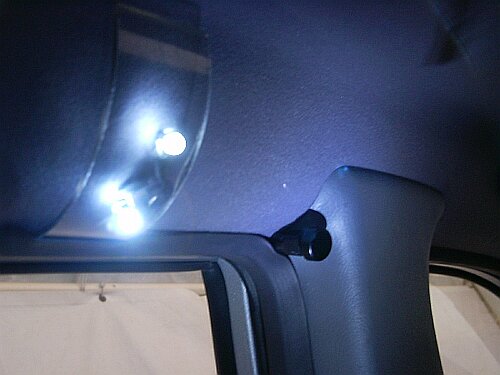
SOLUTION: Add two bright white LEDs to the BS that will illuminate from above. They aren’t the brightest solution, but they are small, take very little power, and I just love LEDs!!!
DISCLAIMER: This is a work in progress! With the new baby and my reluctance to punch holes and tear apart my “new” car I did this quick. I made the process much more difficult than it needed to be, but I really had fun doing it.. HONEST!
One problem, for example, I could have tied into the dome light as a power source, but:
- I may make changes to the LEDs, resistors, etc. and don’t want anything too permanent or difficult to access.
- I have no idea how (and am scared to attempt) to go behind the walls and into the roof!
This isn’t something you’d see in a showroom, but you’ll get the idea of what I’m trying to do. Also, I am by no means an electrician, so use this as a reference and test out your own schematics / electronic configuration.
This was my very first modification to add lights to my 2001 Hyundai Elantra GT. I didn’t know much about electricity, multimeters, etc. but this project REALLY compelled me to learn. I had a BLAST! The process was a long one as I kept bumping into new problems to solve. :o)
MATERIALS:
2 – bright white 5mmLED’s
2 – 5mm LED holders from RadioShack: Item #: 276-080
1 – 33 ohm resistor.
1 – 100 ohm resistor.
1 – Diode (no idea on the specs… you’ll see why).
6 – AA NIMH Batteries.
Misc. clips, wires, etc.
PROCESS:
My whole problem stems from the fact I’m not going to pull power from the dome light. If I had done that this would be way short.
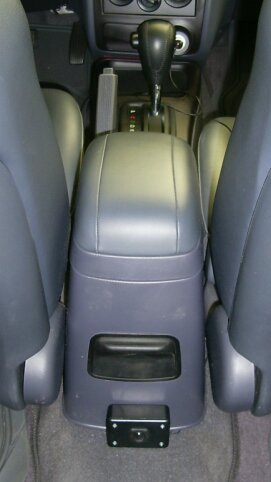
STEP 1: I decided to draw from the cigarette lighter using an adapter and resisting the current. I was going to put a switch down between the seats on the back of the middle console. This would allow me to hide the wires easier and have easy access to the switch. Should have been super easy… something like this:
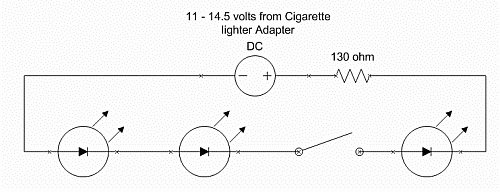
Things seemed to be fine… UNTIL… I realized that I only get power from the lighter when the keys are in the ignition. Well, I don’t want to get my stuff out of the back seat and have to climb back in to retrieve my keys.
STEP 2: I though.. “I’ll use a battery pack instead.” … UNTIL… I realized the problem now is having to change batteries, especially if the light is left on accidentally. I could use rechargeable batteries … UNTIL… I remembered all NIMH or NICAD have “self discharge” rate of about 5% a day meaning I would be loosing power even if I didn’t have the lights on.
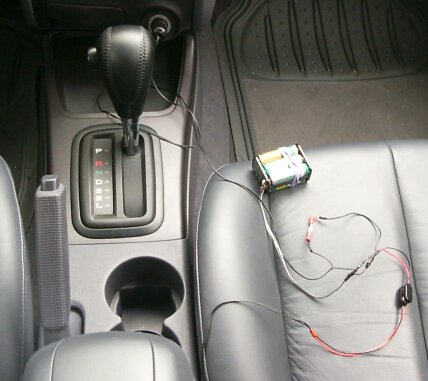
STEP 3: Okay, how about using the car to charge the battery pack while I’m driving so I can use the lights any time I want. I used some information I got on the net to find charging rates and started hooking stuff together to run some tests. Here is what I had:
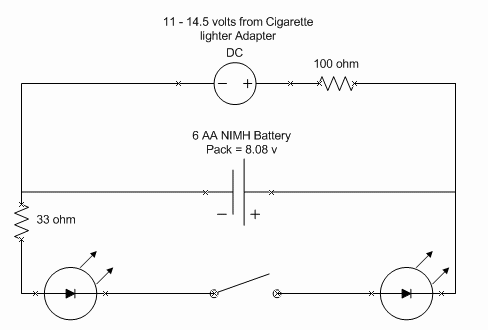
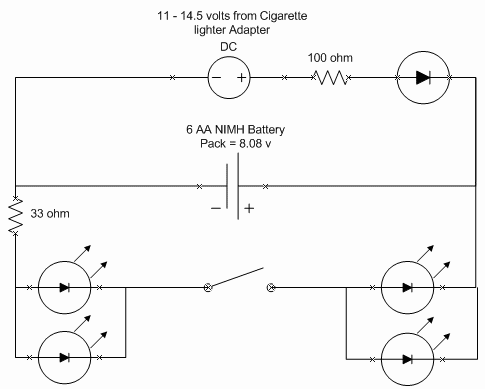
I was pretty impressed with myself. Something interesting is that the 100 ohm resistor limits current to the battery pack. The 33 ohm resistor limits current to the LEDs, and both of them together limit current from the car alternator to the LEDs.
STEP 3: Everything seemed to be almost perfect. I used my multimeter and read the voltage and current going to every part of my beast. There were 37 ma going from the car battery to the battery pack and about 13 ma going from the battery pack to the LEDs (kept low initially on purpose). Everything was fine again… UNTIL… I noticed that when I turned off the engine there was a 25 ma draw from my BATTERY PACK to the car!?!? I don’t know why, I don’t know how, but I was now loosing more juice from my pack into this void than I was putting into it while driving around. CRAP!
I was stumped… what the heck was I going to do. I thought I had been beaten and decided to move to something else to let my brain rest. I decided to pull apart a portable electric breast pump that we were going to throw away since it was broken and see if I could salvage the motor. As I pulled it apart I saw a very simple design: batteries, switch, motor, diode… wait, a DIODE… isn’t their job to direct current one way? Heck, it was work a try! I grabbed the diode (I knew nothing about its specs) and put it in series with my resistor. I jumped in my car and HALLELUJAH!!! I had 37 ma of current flowing from my car to the battery pack, and ZERO ma flowing from my pack to the car.
Here is the final schematic:
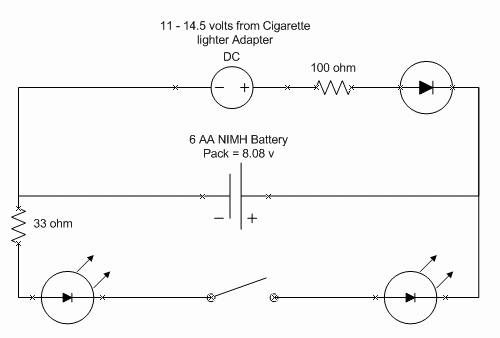
So, what is the moral of this experience? NONE! I just had lots of fun learning about electronics and how to read a stinkin’ multimeter!
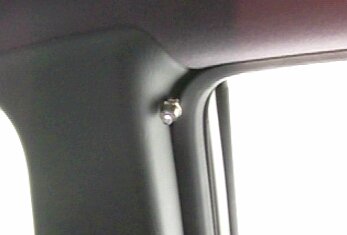
Here is the LED sticking out from the weather stripping in the back door. This is temporary until I find out where I want to drill into to place the LED permanently.
My mess of wires, diodes, batteries, resistors, etc. I have it all setup so I can measure current and voltage throughout the different paths.
The temporary switch.
Video: 2.2 mb video. Use windows media player. GT-backseat-led-video.wmv
UPDATE: 8/14/03
I was tired of bending down to hit the switch when I wanted light, and I wanted more power, so below is what I did.
Add more LEDs in a new holder:
I wanted to add two more LEDs in parallel with the ones I already had so I made a new holder out of the plastic from a “Money Mill” coin sorter, drilled a few holes and stuck in the LEDS with some of the small black LED holders from RadioShack.
Move / change the switch:
The old position was a bit of a pain to get to from outside of the car so I wanted a switch by the door. I found that there is a good use for an old 486 PC… rip out the “turbo” button and throw everything else away! :o) I took out the old switch and wired in my new “turbo” switch!
I must say I am MUCH happier with what I have now!
Here is the new setup:
with a flash:
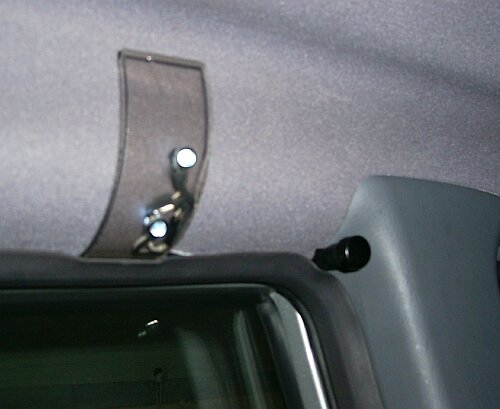
without a flash:
